
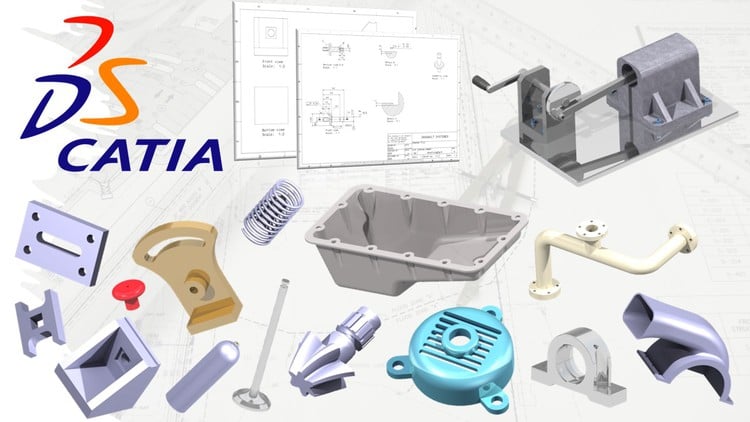
CATIA V5 Course from beginner to advanced
Khóa học CATIA V5 từ cơ bản đến nâng cao
4.7
(111 đánh giá)
348 học viên

Giảng viên
Kevin Syc
Phụ đề tiếng Anh
Bán chạy
Đánh giá cao
50.000đ
399.000đ
-87%
Bao gồm phụ đề tiếng Việt, tiếng Anh
13.0 giờ video
55 bài giảng
Truy cập vĩnh viễn
Học trên mọi thiết bị
Cập nhật: 31/05/2026
Bạn sẽ học được gì
Yêu cầu
Có khả năng sử dụng Windows ở mức cơ bản.
Sở hữu phần mềm CATIA V5; các phiên bản khác cũng có thể chấp nhận được, nhưng bạn có thể thấy một vài khác biệt nhỏ trong giao diện.
Đối tượng phù hợp
Nội dung khóa học
6 phần • 55 bài giảng
1
Các workbench trong CATIA
2
Giao diện người dùng Part Design
3
Xem và tương tác với chi tiết
4
Giới thiệu về workbench Sketcher
5
Ràng buộc trong bản phác thảo (Sketches)
6
Màu sắc của ràng buộc
1
Ví dụ 1 – Các lệnh Profile, Circle và Pad
2
Ví dụ 2 – Các lệnh Rectangle, Elongated Hole và Mirror
3
Ví dụ 3 – Lệnh Corner
4
Ví dụ 4 – Các lệnh Arc, Trim, Quick Trim, Chamfer, Pocket
5
Ví dụ 5 – Nâng cao hiểu biết về các lệnh Pocket và Multi-Pocket
6
Ví dụ 6 – Các lệnh Tangent Arc và Cylindrical Elongated Hole
7
Ví dụ 7 – Các lệnh Pad và Multi-Pad
8
Ví dụ 8 – Các chức năng nâng cao của lệnh Pad
9
Ví dụ 9 – Tay nắm (Hand Knob) sử dụng lệnh Shaft
10
Ví dụ 10 – Xu páp động cơ (Engine Valve) sử dụng lệnh Shaft
11
Ví dụ 11 – Chỉnh sửa tay nắm sử dụng lệnh Groove
12
Ví dụ 12 – Các chức năng nâng cao của lệnh Shaft, Dynamic Sectioning
13
Ví dụ 13 – Lệnh Hole
14
Ví dụ 14 – Rectangular Pattern Definition
15
Ví dụ 15 – Nắp động cơ (Motor Cover) sử dụng các lệnh Circular Pattern và Remove Faces
16
Ví dụ 16 – Lệnh Fillet
17
Lệnh Chamfer
18
Ví dụ 16 – Bình gas (Gas Bottle) sử dụng các lệnh Shell và Thread/Tap
19
Ví dụ 17 – Các te dầu (Oil Pan) sử dụng các lệnh Draft và Offset
20
Ví dụ 18 – Thân ổ đỡ (Bearing Housing) sử dụng lệnh Plane
21
Lệnh Draft
22
Ví dụ 19 – Ống nước (Water Pipe) sử dụng lệnh Rib
23
Ví dụ 20 – Lò xo (Spring) sử dụng các lệnh Helix và Rib
24
Ví dụ 21 – Đầu nối khí nén (Pneumatics Adaptor) sử dụng lệnh Slot
25
Lệnh Multi-Sections Solid
26
Ví dụ 22 – Ống dẫn khí (Air Duct) sử dụng Multi-Sections Solid
27
Ví dụ 23 – Trục có răng (Geared Shaft) sử dụng lệnh Multi-Sections Solid
28
Ví dụ 24 – Lệnh Stiffener
29
Ví dụ 25 – Khối rãnh then (Keyway Block) sử dụng lệnh Combine
30
Ví dụ 26 – Giải thích nâng cao về Specification Tree
31
Khuôn chai (Bottle Mould) sử dụng lệnh Boolean Operations
32
Gán vật liệu (Applying Material)
33
Kết xuất hình ảnh (Rendering)
1
Giới thiệu về workbench Assembly Design
2
Ràng buộc trong workbench Assembly Design
3
Nghiên cứu tình huống – Phần 1
4
Nghiên cứu tình huống – Phần 2
5
Chỉnh sửa cụm lắp ráp (Assemblies)
6
Cắt lát, phát hiện va chạm, và chế độ xem nổ (Sectioning, Clash Detection, Exploded View)
1
Giới thiệu
2
Chèn một chi tiết (Component)
3
Chèn các hình chiếu thủ công và sử dụng View Wizard
4
Ghi kích thước cho bản vẽ
5
Bảng lỗ (Hole Table)
6
Bản vẽ lắp với Bảng kê vật tư (Bill of Materials) và Balloons
7
Các lệnh cuối cùng và xuất bản vẽ
1
Giới thiệu về workbench Kinematics
2
Mô phỏng cụm lắp ráp
1
Lời chúc mừng và kết thúc khóa học
Giới thiệu khóa học
Welcome to this CATIA tutorial! This tutorial is designed to get you from a complete beginner to advanced user of CATIA easily comfortable with 3D modelling.
Catia is one of most widely used softwares for 3D CAD (Computer Aided Design). It is used in wide variety of industries, from aerospace and automotive through oil and gas all the way to food industry and many others. Learning this software will undoubtedly increase your employability within engineering sector and will open door to many other possibilities of either further learning or industry paths. This course will be your guide in every step!
Why choose this course?
Commands are explained on real examples so you will see how they are used within context of a component rather than just understanding what each command does. We have over 25 examples that we will be completing!
Each new component requires you to use commands you have already learnt and therefore reinforces your already gained knowledge, while new commands are being built on top.
No previous experience needed. This course has been designed to start from absolute beginning.
Taught by a tutor with more than 8 years of experience in CATIA. The tutor currently works as Design Engineer and uses 3D CAD on daily basis to design components.
100 CAD examples at the end for you to practice.
Course dwells into details of methodology of design and puts emphasis on properly understanding impact of your constraints and design decisions and 3D modelling
How is the course structured?
Introduction into CATIA
We are first going to discuss workbenches in CATIA, what they mean and what they are used for
We will then set-up our Part Design workbench and I will explain its interface
We will the understand how to navigate in CATIA, manipulate the parts and move the screen
We will then proceed with overview of commands in Sketcher Workbench to understand how they work
We will then discuss how constraining the sketches works
We will explore what different colours of constraints mean
Let's start sketching and modelling!
We will be using Sketcher Workbench and Part Design workbench together to create more than 25 components!
Increasing level of component difficulty
Using the commands over and over while new commands are being built on top
Mixture of component based learning approach and detailed isolated explanation of some particular commands
Assembly Design Workbench
We will start with introduction into Assembly Design Workbench, how to open it, interface and importing components
We will then look at explanation of all relevant constraints in the Assembly Design Workbench
We will then build an assembly that converts rotational motion to linear motion
We will the look at editing assemblies
We will then look at how to section an assembly, clash detection and exploded view
Drafting Workbench
We will look at interface and how to create a new sheet and change its size and properties
We will look at inserting a component and creating different views
We will then dimension a drawing
We will create a Hole Table
We will create and Assembly drawing with Bill of Material and Balloons
We will look at exporting drawings
Kinematics Workbench
We will look at setting up a simple simulation to understand the principles
We will simulate our assembly that we had created before
Don't hesitate, sign up today, and learn how to create 3D models in one of the most respected CAD softwares! Click to join and I will see you on the course!
50.000đ
399.000đ
-87%
Bao gồm phụ đề tiếng Việt, tiếng Anh
13.0 giờ video
55 bài giảng
Truy cập vĩnh viễn
Học trên mọi thiết bị
Cập nhật mới nhất: 31/05/2026
Khóa học liên quan
Khám phá thêm các khoá học cùng chủ đề

Khóa học toàn diện về AutoCAD Electrical 2021
CADCIM Technologies
4.2
(955)
69,769
50.000đ
509.000đ
-90%

Khóa học hoàn chỉnh về AutoCAD Electrical 2022
CADCIM Technologies
4.4
(518)
22,796
50.000đ
1.219.000đ
-96%

AutoCAD Civil 3D - Khóa học MEGA về Công trình Dân dụng - AulaGEO
AulaGEO Academy
4.4
(883)
20,361
50.000đ
399.000đ
-87%
SOLIDWORKS: Khóa học từng bước hoàn chỉnh cho người mới bắt đầu
Alen Oletic
4.6
(400)
14,110
50.000đ
479.000đ
-90%


AutoCAD Electrical 2025: Bài tập hướng dẫn, Thực hành & Dự án
CADCIM Technologies
4.2
(297)
8,896
50.000đ
399.000đ
-87%

Catia V5 Từ Cơ Bản Đến Nâng Cao - Ứng Dụng Ô Tô và Công Nghiệp
Alexander Consulting
4.6
(6125)
26,497
79.000đ
369.000đ
-79%

Thành thạo CATIA V5: 500 Ví dụ | 20 Dự án | 300 Câu hỏi & Đáp | 10 Bài kiểm tra
Roy Academy
4.5
(3100)
12,619
99.000đ
349.000đ
-72%


Catia 3DEXPERIENCE (Catia V6) cho người mới bắt đầu & người dùng Catia V5
Alexander Consulting
4.4
(837)
3,207
50.000đ
399.000đ
-87%

Thiết kế Chi tiết Tôn trong CATIA V5 Từ Cơ bản đến Nâng cao
G Suresh Kumar
4.5
(18)
109
50.000đ
399.000đ
-87%

Catia 3DEXPERIENCE 2026 (Catia V6) | Thiết kế hình học tạo sinh
Alexander Consulting
4.9
(11)
64
50.000đ
399.000đ
-87%

AutoCAD Electrical 2024: Loạt bài hướng dẫn
CADCIM Technologies
4.5
(536)
18,157
50.000đ
349.000đ
-86%
![AutoCAD cho Kỹ sư Xây dựng + Cơ bản về Revit – 2 trong 1 [2026]](https://studyvn.academy/assets/uploads/course_6a1802ba824c9.jpg)
AutoCAD cho Kỹ sư Xây dựng + Cơ bản về Revit – 2 trong 1 [2026]
Akshay Kamath
4.4
(334)
13,884
50.000đ
1.239.000đ
-96%

Rhino 3D - Từ Cơ Bản Đến Nâng Cao - Khóa Học Toàn Diện
Amir Karami • BIM
4.7
(531)
12,778
79.000đ
1.369.000đ
-94%
Thành thạo CATIA V5: 500 Ví dụ | 20 Dự án | 300 Câu hỏi & Đáp | 10 Bài kiểm tra
Roy Academy
4.5
(3100)
12,619
99.000đ
349.000đ
-72%

Khóa học AutoCAD 2D&3D hoàn chỉnh từ cơ bản đến nâng cao
Rajesh K
4.5
(1339)
7,123
99.000đ
1.389.000đ
-93%


SOLIDWORKS: Trở thành Chuyên viên được Chứng nhận Ngay hôm nay (CSWA)
Tayseer Almattar
4.5
(11143)
43,682
50.000đ
349.000đ
-86%

Kiến thức cơ bản về Dung sai hình học (GD&T)
Mufaddal Rasheed
4.4
(7708)
28,710
50.000đ
349.000đ
-86%


SOLIDWORKS: Trở thành Chuyên viên Chứng nhận Ngay Hôm Nay (CSWP)
Tayseer Almattar
4.6
(3536)
16,447
50.000đ
359.000đ
-86%

Kỹ thuật Ô tô: Những Nguyên lý Cơ bản về Ô tô
Lluís Foreman - ValueKnow
4.6
(3850)
13,623
50.000đ
409.000đ
-88%

Thiết Kế HVAC Cho Người Mới Bắt Đầu: Thiết Kế Phân Phối Không Khí HVAC Từ A-Z
ExpertEase Global
4.5
(313)
13,121
50.000đ
399.000đ
-87%
